
7 Dangerous Mistakes After Hip Replacement Surgery
7 Dangerous Mistakes After Hip Replacement Surgery:
Common Pitfalls and Practical Tips to Enhance Your Recovery
This article contains product affiliate links. We may receive a commission at no extra cost to you if you make a purchase after clicking on one of these links.
Introduction
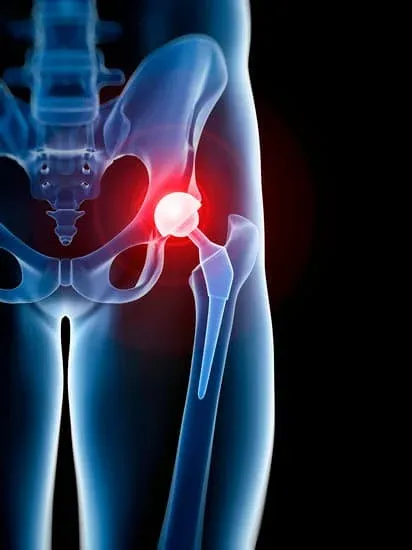
Understanding Hip Replacement
Hip replacement surgery can be a game-changer for many individuals
...suffering from chronic hip pain,
…offering a shot at a more mobile and pain-free life.
While the surgery has evolved with different approaches,
…this article focuses on the posterior (or posterior-lateral) approach.
Terminology: “posterior" means "back" and "anterior" means "front."
When we talk about the posterior approach in hip replacement surgery,
…it means the surgeon accesses the hip joint from the backside,
…specifically through the buttock area, behind the hip.
This technique, while popular and effective, comes with
…specific post-operative precautions.
Ignoring these guidelines can lead to the

…dislocation of the hip prosthesis,
…a painful and severe complication.
Before we delve into the seven potentially dangerous mistakes,
…let's briefly touch on what hip replacement surgery entails.
What is Hip Replacement Surgery?
During a hip replacement, the damaged parts of the hip joint
…are removed and replaced with artificial components
…made of metal, ceramic, or plastic.

This prosthetic joint mimics the movement and function of a natural hip,
…eliminating pain and improving mobility.
The posterior approach involves accessing the joint from the back,
…which leads to specific recovery precautions
…primarily designed to prevent the dislocation
…of the newly placed prosthesis.
Total Hip Replacement (THR) vs. Partial Hip Replacement (Hemiarthroplasty)
A hip replacement surgery aims to replace a damaged hip joint
…to relieve pain and restore mobility.
However, not all hip replacements are the same.
Depending on the extent of damage and the patient's needs,
…the surgeon may recommend a total hip replacement
…or a partial hip replacement.
Here's how they differ.
1. Total Hip Replacement (THR) or Total Hip Arthroplasty (THA):
Terminology:
Both terms, "Total Hip Replacement (THR)" and
…"Total Hip Arthroplasty (THA)," refer to the same procedure.
arthro-
of a joint; relating to joints.
-plasty
molding, grafting, or formation of a specified part, especially a part of the body.
While "replacement" is the more commonly used term in everyday language,
…"arthroplasty" is a more technical term often seen in medical contexts.

By Maajid Shafi - Own work, CC BY-SA 4.0, https://commons.wikimedia.org/w/index.php?curid=114286015
What's Replaced: In THR, both the ball (head of the femur) and the socket (acetabulum) of the hip joint are replaced.
Materials Used: The ball is typically made of metal or ceramic, and the socket is usually a metal shell with a plastic liner.
Who Needs It: It's primarily for patients with arthritis throughout the hip joint or other conditions affecting both the ball and the socket.
2. Partial Hip Replacement (Hemiarthroplasty):

By Carl Jones, Nikolai Briffa, Joshua Jacob2 and Richard Hargrove - (2017). "The Dislocated Hip Hemiarthroplasty: Current Concepts of Etiological factors and Management". The Open Orthopaedics Journal 11 (Suppl-7, M4): 1200–1212. DOI:10.2174/1874325001711011200. ISSN 1874-3250., CC BY 4.0, https://commons.wikimedia.org/w/index.php?curid=74093874
What's Replaced: Only the ball (femoral head) of the hip joint is replaced.
Materials Used: A metal ball on a stem is inserted into the femur, fitting into the patient's natural socket.
Who Needs It: This is often chosen for older patients who have fractured just the femoral head or have diseases that primarily affect only the ball part of the hip.
Hemiarthroplasty is less commonly used than THR.
What Type of Hip Replacement Is Right For You?
The type of hip replacement surgery you need depends on the
Condition of your hip joint
Your age
Activity level
Surgeon's assessment
It's essential to have a detailed discussion with your orthopedic surgeon
…to determine the best option for you.
Now we are ready to explore the 7 mistakes that can complicate or derail your recovery.
Mistake # 1: Crossing Your Legs or Ankles

Courtesy of HEP2go
Crossing your legs or ankles can apply uneven pressure and strain
…on your new joint, increasing the risk of hip dislocation,
…especially with a posterior approach.
Pro-Tip #1:
First several weeks after surgery
Sleep on your back
Use a wedge between your knees to prevent your legs from crossing.
Mistake # 2: Bending Your Hip More Than 90 Degrees
After surgery, maintaining your hip's stability is essential.
Bending the hip beyond 90 degrees—whether by bringing your thigh up towards your torso or bending your torso forward—poses a significant risk.
Such movements can lever the new joint out of its socket, leading to a dislocation.
Pro-Tip #2: Elevated Sitting
Always ensure that your hips remain higher than your knees when sitting.
This positioning safeguards against potential dislocation
…and can help reduce post-operative soreness.
Mistake # 3: Twisting Your Hip Inward

Courtesy of HEP2go
With the joint accessed from the back of the hip during surgery,
…sudden twisting movements can misalign the hip prosthesis,
…risking its dislocation.
Pro-Tip #3:
Always be conscious of your foot position.
Turning your hip inward can make you walk "pigeon-toed."
When sitting, standing, or lying down, ensure your toes are pointed upwards or slightly outwards, not inwards.
If you're sitting for extended periods, periodically check your foot position to make sure you aren't accidentally turning your hip in.
If you need a reminder, consider using a visual aid, like a small piece of colored tape on the side of your shoe, to encourage outward-toe positioning.
Mistake #4: Trying to Put on Your Shoes and Socks Without an Assistive Device

Courtesy of HEP2go
Such movements often require bending and twisting.
The combination of these movements has a high potential for dislocating your new hip.
Pro-tip #4: Utilize Assistive Devices
Putting on socks or picking items off the floor might seem challenging post-surgery.
Using tools like a sock aid or a reacher/grabber
...can make these tasks easier and safer, ensuring you don’t bend
...or twist your hip dangerously.
Mistake # 5: Sleeping on Your Side Without a Pillow Between Your Knees
Ensuring the hip remains in a neutral position
…minimizes stress on the joint and the risk of inadvertent crossing
…or twisting that can lead to dislocation.
Pro-tip #5: Sleep Positioning
In the initial weeks post-surgery, it's safest to sleep on your back.
Place a wedge or pillow between your knees.
This prevents inadvertent leg crossing or twisting, which could jeopardize the new joint.
Mistake #6: Sitting on Low Chairs or Toilets
Beyond the challenge of standing up from a low position,
…such a seated angle can force the hip into a position
…that might pop the joint out of place.
Pro-tip #6: Modified Toilet Use

A raised toilet seat can be a game-changer, ensuring you don't bend your hip excessively.

Alternatively, a bedside commode placed over your existing toilet (with the bucket removed) can also serve the purpose.
Mistake #7: Not Doing “Ankle Pumps” Exercises
Blood circulation is key post-surgery to prevent blood clots.
"Ankle pumps" aid in maintaining good blood flow in the lower extremities.

Courtesy of HEP2go
More Pro-tips:
Pro-tip #7: Change Positions Regularly
While rest is important, staying in one position for an extended period can lead to stiffness and other complications.
Try to shift your position at least every half hour when awake, even if it's just a minor adjustment.
Pro-tip #8: Frequent Walking
Engage in regular walking sessions.
Not only does it enhance circulation and prevent blood clot formation,
...but it also aids in regaining strength and mobility in your new hip.
Pro-tip #9: Use a Walker
Safety first!
Use a walker for as long as necessary.
It provides the stability needed, allowing you to walk confidently
...without overstraining the operated hip.
Listen to your body and make the switch to other assistive devices, like a cane,
...only when you feel truly ready.
Even if you have a 4-wheel walker (rollator with the seat),
...the best walker to use after hip replacement surgery is a two-wheel walker.
Pro-tip #10: Step-to-Gait for Soreness
If you experience soreness in your new hip, adopt a "step-to" gait strategy.
This involves taking a longer step with the operated leg
...and a shorter one with the non-operated leg.

Courtesy of HEP2go
By doing this, you'll spend less time bearing weight on the sore hip,
...thus potentially reducing discomfort.
Turning after Hip Replacement: A Step-by-Step Guide
A. Turning towards the good side:
1. Begin by positioning yourself to move in a broad arc, rather than making a sharp turn.
2. Slowly take small, deliberate steps.
3. As you progress in your turn, be conscious of maintaining a smooth, wide radius, which reduces stress on the operated hip.
B. Turning towards the operated side:
1. Start with your feet positioned shoulder-width apart.
2. As you initiate the turn, ensure that the foot of the operated side is angled outwards slightly.
3. With every step during the turn, maintain this outward foot angle. It will help prevent internal rotation of the hip (turning the hip inward) and reduce the risk of dislocation.
4. As with turning to the good side, aim to move in a wide arc and avoid sharp turns.
Pro-Tip # 11:
Imagining you are walking around the edge of a small hula hoop can help you maintain a good radius when turning.
This visualization can aid in keeping your turns wide and safe.
It's important to move slowly and with intention, especially in the early stages of recovery.
Always prioritize safety and consult with your physical therapist for more specific guidance tailored to your situation.
Safely Getting In and Out of Bed After Hip Replacement
Moving in and out of bed might feel tricky after hip surgery.
But with a few pointers, you can do it comfortably and safely.
Getting into Bed:
1. Approach the bed and sit down on the edge.
2. Before you bring up either leg,
…scoot back and diagonally towards the head of the bed
…as far as you can get
…until you feel that your knees are supported.
This way, your legs don't have to lift as high,
…making things easier and safer.
3. Bring your legs up one at a time.
If your operated leg feels weak or it's hard to lift,
…use a stretching strap or a loop with a handle
…to give it a gentle pull up.
Getting Out of Bed:
1. Start by sitting up first.
2. Swing your legs over the edge of the bed.
3. Remember the rule: Don't let your operated leg cross the center of your body.
Think of an imaginary line running down the middle of you.
That leg shouldn't cross it!
Pro-tip # 12:
A stretching strap or a loop with a long handle can be a lifesaver during the early days of recovery.
It helps lift a leg that might not feel strong enough yet.
Always keep one handy by your bedside.
NOTE:
It is considered to be ideal to get out of bed on your non-operated side and get into bed on your operated side.
However, frequently, this is difficult to do due to bed location.
The scooting-up technique will help you to get in and out of bed safely on either side.
Sitting Down in a Chair Safely
When you're about to sit down after hip surgery,
…you want to be especially gentle with your operated leg.
Pro-tip #13:
Before you sit, extend your operated leg forward.
This simple move takes the weight off it, ensuring a safer and more comfortable seating experience.

Courtesy of HEP2go
Remember, little adjustments like this can make a big difference in your recovery journey!
Navigating Stairs After Hip Replacement
Going Up:
Always remember the phrase, "Up with the good."
When you're climbing stairs, lead with your non-operated leg.
This allows you to use the strength of your non-operated leg to lift yourself up, which is safer and reduces strain on your healing hip.
Going Down:
On the descent, the adage is "Down with the bad."
Lead with your operated leg when going down the stairs.
This way, your non-operated leg, which is bearing most of your weight, is in a more stable position on the step above.
Pro-tip #14:
Always use handrails when available.
They provide an added layer of support and safety, especially during the initial stages of recovery.
Remember, these guidelines are designed to minimize stress
…on your operated hip and ensure you're moving in ways
…that promote healing and prevent injury.
If stairs seem daunting at first, consider practicing with a physical therapist
…or under supervision until you're confident.
Getting in and out of a car safely after hip replacement
1. Entering the Car:
a. Approach the car from the front, ensuring the passenger seat is pushed all the way back and reclined slightly.
b. Sit down first, keeping your operated leg straight out in front of you.
c. Once seated, use your arms and non-operated leg to pivot your hips and slide into the car.
d. Bring the operated leg into the car last, using your hands or a strap if necessary to help lift the leg without bending your hip too much.
2. Exiting the Car:
a. Slide your hips to the car door edge while keeping the operated leg extended.
b. Use your hands to help lift and swing your operated leg out of the car, keeping it as straight as possible.
c. With the operated leg out, place your hands on the armrest or seat to push yourself to a standing position.
d. Remember to stand up without bending forward excessively, as this can strain the new hip joint.
Pro-tip # 15:
Consider using a plastic bag or silky fabric on the seat.
This reduces friction and can make the pivoting motion smoother and more comfortable.
Conclusion
Securing a Smooth Recovery After Hip Replacement Surgery
To reiterate, here are the 7 Dangerous Mistakes to avoid:
1. Crossing your legs or ankles.
2. Bending your hip more than 90 degrees.
3. Twisting your hip inward.
4. Trying to put on your shoes and socks without assistance.
5. Sleeping on your side without proper support.
6. Sitting on low chairs or toilets.
7. Neglecting ankle pump exercises.
The posterior approach to hip replacement
…is a tried and tested surgical technique,
…but its success heavily relies
…on the patient's adherence to post-operative precautions.
By steering clear of the seven mistakes highlighted above,
…you're giving your new hip the best chance
…at a long and problem-free lifespan.
Always, always consult with your healthcare professionals!

The right recovery strategies lay the foundation
for a lifetime of mobility and freedom from pain.
I hope that the insights shared in this article will guide you toward a successful recovery after hip replacement surgery.
If you found this article helpful, consider sharing it with others who might be on a similar journey.
Together, we can make the road to recovery a little less daunting.
Don't forget to sign up for my blog and receive our "Guide to Simple and Effective Stretching" absolutely FREE!

Below you'll find a list of related articles that can offer further insights.
I also encourage you to explore other articles on our website for relief solutions to lower back, knee, hip, shoulder, elbow, and foot/ankle injuries.
Remember, you're not alone in your journey.
I am here to provide the information and support you need.
Related articles:
7 Costly Mistakes to Avoid After Knee Replacement Surgery
Conquering Hip Pain Part 1
How To Choose the Best Physical Therapist For Your Needs
Disclaimer
Although we strive to provide the most accurate information possible, please note that this chart is provided for informational purposes only. It is not a substitute for professional medical treatment, advice, and/or diagnosis. Always seek out the advice of a physician or other qualified health provider when seeking information for a medical condition or medication. This information is not to be taken as medical advice. Always consult with your physician when changing/stopping/starting any medication, supplement, or exercise program. This material is provided on an 'as is' basis. We make no warranties, expressed or implied, and hereby disclaims and negates all other warranties including, without limitation, implied warranties or conditions of merchantability, fitness for a particular purpose, or non-infringement of intellectual property or other violation of rights. Further, we do not warrant or make any representations concerning the accuracy, likely results, or reliability of the use of this material.

