
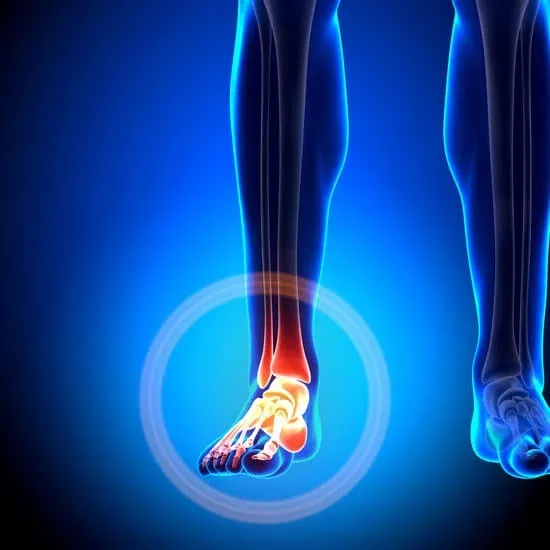
Getting Back On Your Feet Part 2: Practical Treatment Interventions for Ankle Injuries"
This article contains product affiliate links. We may receive a commission (at no additional cost to you) if you make a purchase after clicking on one of these links. Thank you for your support.
Welcome to Part 2 of your guide to understanding and treating ankle injuries.
Having explored the causes, symptoms, and how-to's of recognizing different ankle issues in Part 1, we now step into the realm of recovery.
This section is all about the practical, hands-on strategies you can employ right in the comfort of your home to alleviate pain, promote healing, and strengthen your ankle. We'll journey from immediate post-injury care to exercises and preventive measures, right up to knowing when it's time to seek professional help. So, let's roll up our sleeves and start taking strides toward recovery together!
At-Home Relief Solutions For Ankle Sprains and Strains
When you've injured your ankle, quick and appropriate at-home care can help speed up your recovery process and prevent further damage. Here's what to do:
1. Initial Response
If you've just injured your ankle, the first thing to remember is not to panic. Your initial response can greatly affect your recovery. Here are the steps you should follow:
Stop any ongoing activity: Continuing to use the injured ankle can cause further damage. As soon as you suspect an injury, stop what you're doing and rest.
Assess the injury: Try to assess the severity of the injury.
Can you move the foot?
Is there immediate swelling or bruising?
If the injury appears severe (e.g., deformity, inability to bear any weight), seek immediate medical attention.
2. The PRICE-E Method
The PRICE-E method is a widely used approach to treating soft tissue injuries like sprains and strains at home during the first 24-72 hours:
P - Protection: Protect the injured area from further harm. For an ankle, this might mean using a brace or splint.

R - Rest: Allow the injury time to heal by limiting movement. Use crutches if necessary to avoid putting weight on the injured ankle.
I - Ice: Apply a cold pack to the injured area for 15-20 minutes at a time, every 2-3 hours. This can help reduce swelling and numb the area, reducing pain.

C - Compression: Use an elastic compression bandage around the ankle to help control swelling.

E - Elevation: Prop up the injured ankle above the level of your heart as often as possible. This can help reduce swelling and promote healing.
E - Electrical Stimulation: This is an optional addition to the PRICE method that might aid healing. Devices for transcutaneous electrical nerve stimulation (TENS) can be purchased for home use. They send small electrical pulses through the skin to the nerves, which may help to reduce pain and promote healing.

3. Pain Relief
Over-the-counter pain relievers like acetaminophen (Tylenol) or nonsteroidal anti-inflammatory drugs (NSAIDs), such as ibuprofen (Advil, Motrin) or naproxen (Aleve), can help manage pain and reduce inflammation.
4. Gentle Exercise and Stretching
After the initial healing phase (typically after the first few days), gentle exercises and stretching can help restore mobility and strengthen the ankle. Start slow and avoid any movement that causes pain.

At-home treatment is suitable for minor to moderate injuries. If your symptoms are severe, don't improve within a few days, or worsen, it's essential to seek professional medical help. Proper diagnosis and treatment can prevent complications and promote a full recovery.
Exercises for Ankle Injuries
Once swelling and pain have decreased, usually after a few days of following the PRICE-E method, you can start an exercise program that will help restore your ankle's strength and flexibility.
Here is the progression:
Gentle Range-Of-Motion (ROM) exercises
Isometric Exercises
Strengthening Exercises with Resistance (Elastic Band)
Stabilization and Proprioception Exercises
There are many exercises and exercise positions. I am providing you with several exercises that are easy to do on your own.
Ankle ROM Exercises

ANKLE ABC's
Courtesy of HEP2GO
This exercise helps to improve your ankle's range of motion.
Sit comfortably and extend your leg out in front of you.
Imagine your foot is a pen and write the alphabet in the air, moving only your foot and ankle.
Repeat 2-3 times through the day.
ANKLE INVERSION (A) AND EVERSION (B)
Courtesy of HEP2GO

INVERSION (A)
Start by lying flat on your back on a comfortable surface like a yoga mat or your bed.
Straighten your legs out in front of you.
Keeping your leg straight, turn your foot inward so that the sole of your foot is facing toward your other leg.
Hold this position for 1-2 seconds, then return to the starting position.
10 repetitions
EVERSION (B)
Remain in your supine position with your legs straight out in front of you.
This time, you'll be moving your foot outward. Turn your foot so that the sole is facing away from your other leg.
Hold this position for 1-2 seconds, then return to the starting position.
Repeat 10 times.
Ankle Isometric Exercises
DEFINITION "Isometric" means there is an effort to move but the resistance is too great to allow the movement. To illustrate it, try to push your hand into the wall.
Isometric exercises are a key component in early-stage ankle rehab because they allow for muscle strengthening without moving the joint, reducing pain and promoting stability.
These exercises improve proprioception (body's spatial awareness - more on this topic below), activate essential muscles, and can be done anywhere, making them a versatile and accessible part of a comprehensive rehabilitation plan.
The exercises below are utilizing a ball. If you don't have a ball, you can use a pillow or a rolled-up towel.

ISOMETRIC PLANTARFLEXION - BALL
Courtesy of HEP2GO
Place a ball on a wall and hold it there with the ball of your foot.
Press the ball against the wall.
Hold for 5 seconds, relax, and repeat.
8-10 repetitions

ISOMETRIC DORSIFLEXION - BALL
Courtesy of HEP2GO
Place a ball on top of your target foot and hold
it in place using the bottom of your other foot
as shown.
Pull your target foot upward bending
at the ankle press it into and against the ball as
your other foot holds the ball in place.
Hold for 5 seconds, relax, and repeat.
8-10 repetitions

ISOMETRIC EVERSION - BALL
Courtesy of HEP2GO
Place a ball on a wall and hold it there with the outer side of your foot.
Hold it there with your foot as you press it against the wall.
Hold for 5 seconds, relax, and repeat.
8-10 repetitions
Ankle Strengthening Exercises With Resistance Band

ELASTIC BAND PLANTARFLEXION -
SUPINE
Courtesy of HEP2GO
You can perform this lying on a comfortable surface such as a mat or your bed.
Anchor one end of the elastic band in your hand and place a looped end around your target foot.
Next, hold the band and pull it to provide some tension in the band.
Then move your target ankle/foot forward (plantarflex your ankle). This is the same motion as when pressing down on a gas pedal of a car.
Return to starting position and repeat.
10 repetitions.
***Check out this excellent selection of resistance bands and resistance tubing

ELASTIC BAND DORSIFLEXION – SUPINE
Courtesy of HEP2GO
You can perform this lying on a comfortable surface such as a mat or your bed.
Anchor one end of the elastic band in a door or a sturdy object (tie a knot in the band and close the door on the band so that the knot is on the other side of the door).
Scoot back until there is tension in the band.
Once there is some tension, pull your foot toward your head.
Return to starting position and repeat.
10 repetitions.

ELASTIC BAND INVERSION – SUPINE
Courtesy of HEP2GO
Start by lying on your back and place a looped end of an elastic band around your target foot.
Next, cross your legs so that the target leg is on the bottom and part of the elastic band is held down by the top foot. Hold the other end in your hand.
Next, move your target ankle so that the toes and foot move to the inside or toward your midline.
Return to starting position and repeat.
10 repetitions.

ELASTIC BAND EVERSION – SUPINE
Courtesy of HEP2GO
Start by lying on your back and place a looped end of an elastic band around your target foot.
Hold down the band with your other foot and then hold the other end in your hand.
Next, move your target ankle so that the toes and foot move to the outside or away from your mid-line.
Return to starting position and repeat.
10 repetitions.

Remember, it's essential to start slowly and avoid pain while performing these exercises. Consistency is key - try to do these exercises several times a day.
If your pain worsens or you don't see gradual improvement, consult with a healthcare professional. A physical therapist can provide you with a personalized exercise plan based on your specific condition and recovery progress.
Balance and Proprioception Exercises
What is Proprioception and Why Is It Important
DEFINITION: Proprioception is the ability to sense and understand the position, location, orientation, and movement of the body and its parts, all without having to look at them.
This sensory system involves nerve receptors (called proprioceptors) in our muscles, tendons, and joints, which send signals to our brain about our body's position and movement.
For example, proprioception allows you to touch your nose with your eyes closed - your brain knows where your hand and nose are in relation to each other without needing to see them.
Let's dive into proprioception and why it's essential not only for your ankle but also for your overall movement and stability.
Imagine for a moment, trying to walk around in a room with all the lights turned off.
You can't see anything, yet, you're able to move around, reach out for objects, or even touch your nose without much difficulty.
How can you do that?
Well, that's proprioception at work!
It's our body's incredible built-in GPS.

Specifically for the ankle joint, proprioception is tremendously important.
In everyday activities and sports, it helps our body respond to varying surfaces, sudden shifts in direction, and unexpected bumps in the road. It's the reason we can walk on uneven ground, navigate stairs, or dance without constantly looking at our feet.
It's all thanks to the sensory information our brain receives about our ankle's position and movement.
And when you take it up a notch to sports - think about a basketball player swiftly pivoting, a soccer player deftly controlling the ball, or a ballet dancer beautifully executing a pirouette - all these movements require excellent ankle proprioception.
Now, what happens after an ankle injury? The communication line between the ankle and your brain may get a bit fuzzy, and the GPS may lose its signal. This situation can make movements unsteady and potentially cause re-injury. That's why it's so crucial to incorporate balance and proprioception exercises into the rehabilitation process.
Single-Leg Balance: Stand near a wall or chair for support if needed. Lift one foot off the floor and try to maintain your balance on the other foot. Aim to hold this position for 30 seconds. Repeat 5 times on each foot.

Single-Leg Balance with Eyes Closed: Once you've mastered the single-leg balance, make it more challenging by closing your eyes. This exercise forces your body to rely more on proprioception. Again, stand near a support and lift one foot off the floor. Close your eyes and try to maintain balance for 30 seconds. Repeat 5 times on each foot.
Heel-To-Toe Walk: Imagine you're walking in a straight line. Place the heel of one foot directly in front of the toes of your other foot. Your feet should be touching. Extend your arms out to your sides for balance, and focus on a point in the distance to keep your balance. Take 20 steps, turn around, and walk back.

Wobble Board/Bosu Ball Exercises: If you have access to a wobble board or Bosu ball, these tools can be excellent for improving balance and proprioception. Start with simple exercises like standing on the wobble board or Bosu ball with both feet, then progress to standing on one foot. Always ensure your safety when using these tools.


As with other exercises, start slowly, prioritize safety, and progress gradually. If these exercises cause pain or if you struggle to perform them safely, seek advice from a healthcare professional. Ankle injuries can be complex, and a physical therapist can provide guidance tailored to your individual needs and abilities.
Prevention of Future Injuries and Maintaining Ankle Health
So, we've covered a lot about understanding ankle injuries and their management.
But hey, wouldn't it be wonderful if we can avoid these troublesome injuries in the first place?
Absolutely! And the best part is that many of the steps toward recovery double as preventive measures.
1. Keep Up with Exercises
Remember those strength, flexibility, balance, and proprioception exercises we just covered? They aren't just for recovery.
Regularly doing these exercises can help keep your ankles strong and agile, reducing the risk of future injury.
2. Wear Proper Footwear
Selecting the right shoes for your activities is like choosing the right tools for a job. Wear supportive, well-fitted shoes appropriate for your activity to protect your ankles.
3. Mind Your Surroundings
Watching out for uneven surfaces or obstacles can prevent a misstep and a potential ankle injury. So, whether you're walking on a forest trail, playing on a sports field, or just getting up for a midnight snack—stay mindful of where you're stepping.
4. Warm Up and Cool Down
Ever notice how a rubber band is more flexible when it's warm? Your muscles and tendons are similar. A good warm-up routine before activity gets your blood flowing and makes your muscles more flexible, reducing the risk of injury. Equally important is a cool-down period, to gradually bring your heart rate down and start the recovery process after your activity.
5. Listen to Your Body
This one is simple but often overlooked. If you're feeling pain or excessive fatigue, or if something just doesn't seem right—stop and rest. Pushing through pain can turn a minor issue into a significant injury.
When to See a Professional
Even though we've been focusing on what you can do at home to manage and prevent ankle injuries, there are times when it's essential to seek professional help.
It's like trying to fix a leaky pipe - sometimes, you can manage it with some tape and DIY spirit, but other times, you really need a plumber.
So, when is it time to call in the pros for your ankle? Here are some signs:
Severe Pain or Swelling: If your pain or swelling is intense and doesn't begin to reduce after a day or two of at-home treatment, it's time to consult a healthcare professional.
Deformity or Inability to Move or Bear Weight: If your ankle looks out of shape or if you can't move it or put any weight on it, these are signs of a possible severe injury like a fracture. You should seek immediate medical help.
Popping Sound or Sensation at Time of Injury: If you heard a "pop" or felt like something ripped at the time of the injury, this could indicate a severe sprain or fracture.
Recurrent or Chronic Pain: If you have ongoing pain in your ankle or if it's frequently getting injured, it's crucial to get it checked out. Persistent issues can sometimes be a sign of underlying conditions that need more targeted treatment.
Inadequate Response to Home Treatment: If your symptoms don't improve after a week or so of at-home treatment, or if they get worse, that's a clear signal that it's time to see a professional.
Signs of Infection: If you notice signs of infection like increased warmth, redness, or pus around the injured area, or if you develop a fever, seek medical help immediately.
Seeing a healthcare professional can provide a thorough evaluation of your injury, a clear diagnosis, and a personalized treatment plan. This can not only speed up your recovery but also prevent further damage or complications.
Plus, it'll give you peace of mind, knowing you're on the right path to recovery.
Because, at the end of the day, we're all just trying to get back to doing what we love, free from pain, right?
Disclaimer
Although we strive to provide the most accurate information possible, please note that all of the content found on ReliefSolutions4you.com, including text, audio, video, and/or other formats are provided for informational purposes only. The content on ReliefSolutions4you.com is not a substitute for professional medical treatment, advice, and/or diagnosis. Always seek out the advice of a physician or other qualified health provider when seeking information for a medical condition or before engaging in physical training. The information on ReliefSolutions4you.com is not to be taken as medical advice. Always consult with your physician when starting a new physical training regimen and/or diet.

